Follow this step-by-step guide to erase your data
1. Access the secloud dashboard
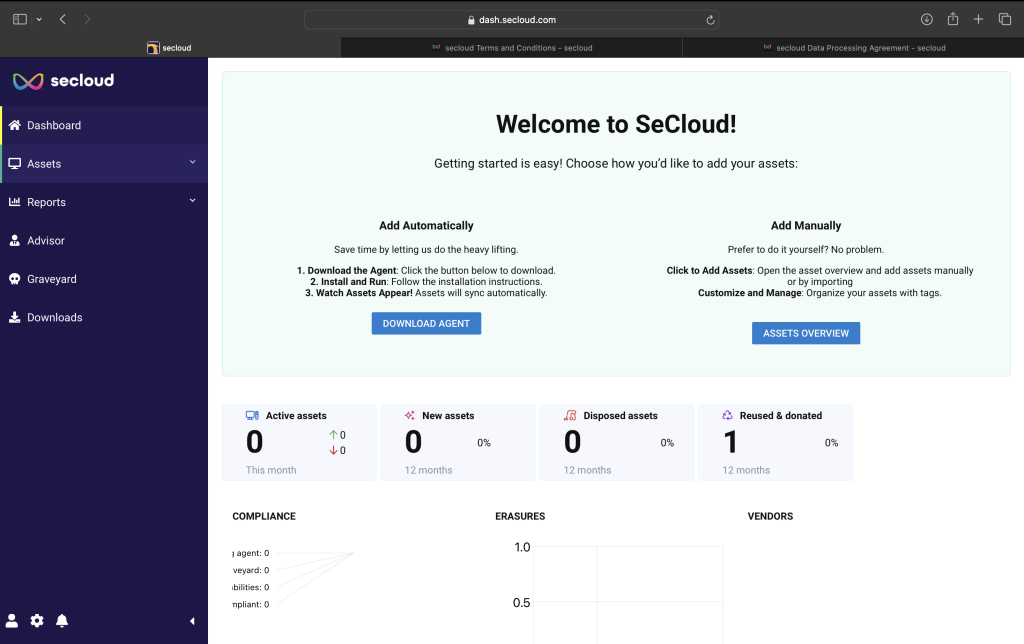
Secloud dashboard
In the secloud dashboard, go to the asset tab on the left-side menu.
There you’ll find an overview of all the assets that you have registered in the dashboard an those that are accessible through the dashboard.
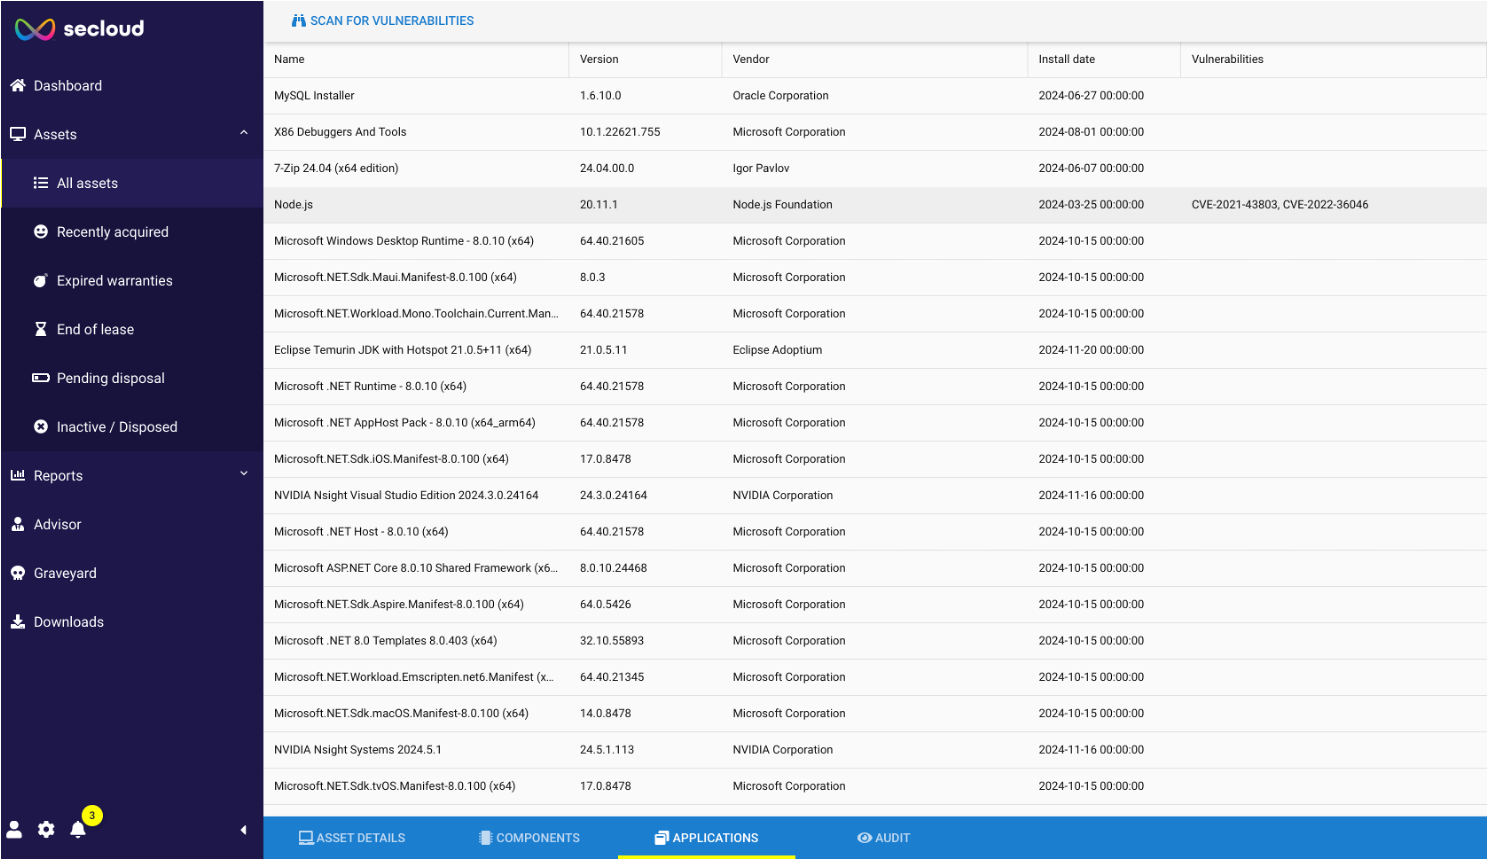
2. List of all enrolled assets
List of assets
In the list of assets – find the asset that you want to erase all the data from. Click on it and you’ll see all the information for the actual asset.
3. Find the remote erasure button in the bottom.

Remote erasure
This is our remote erasure feature that allows you to erase data on devices from anywhere and any time.
Hit the remote erasure button and get ready for the next step.
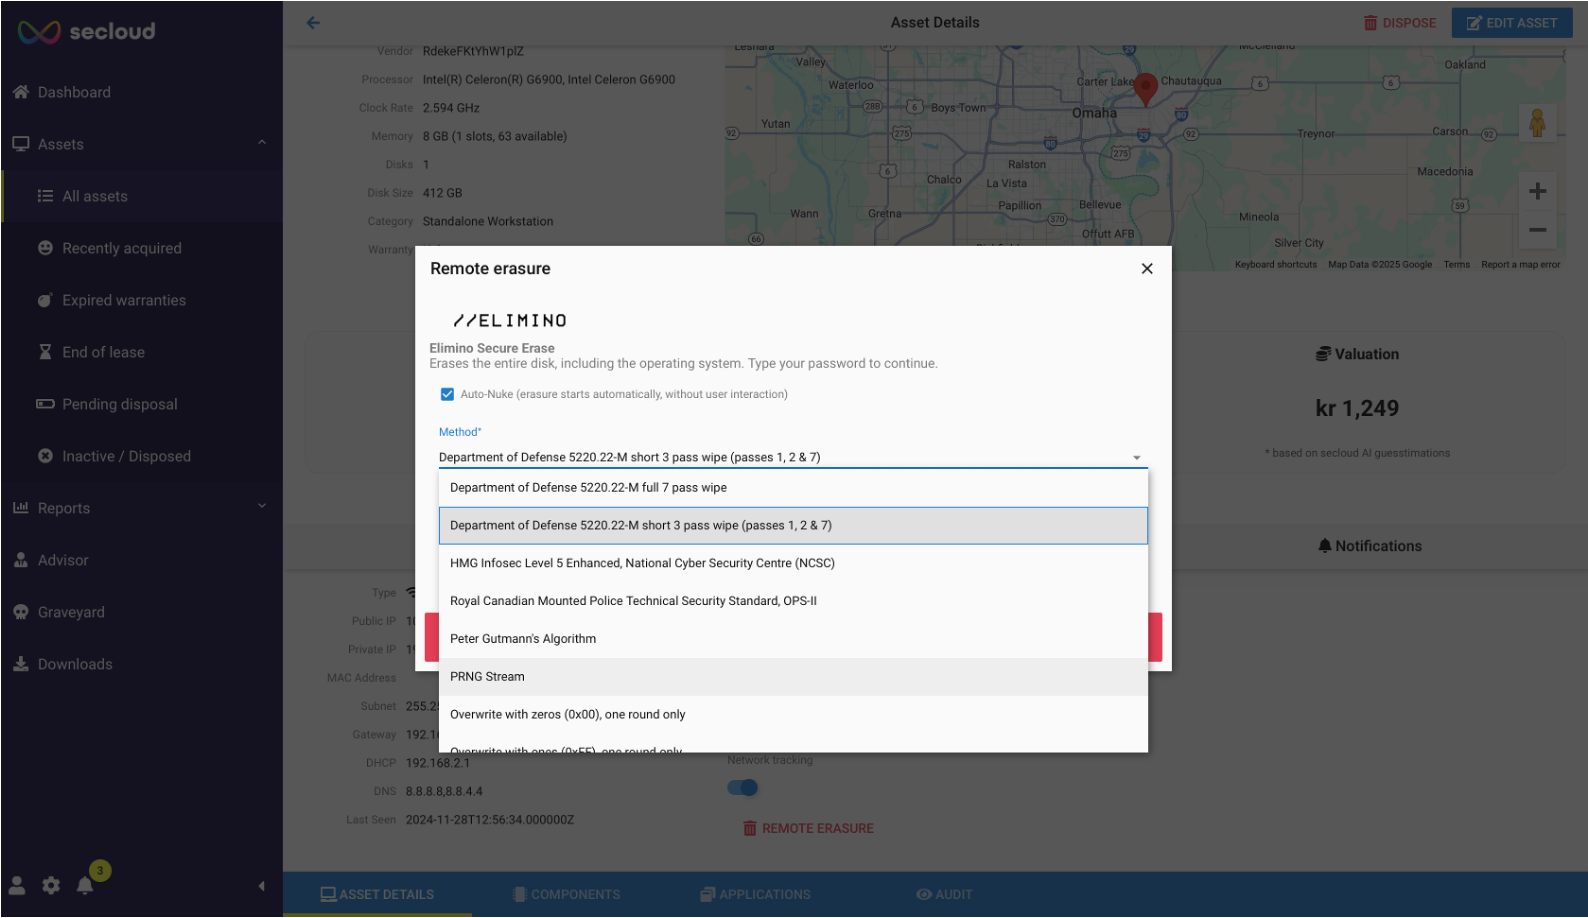
4. Choose erasure method
Erasure methods
With secloud you can choose from a variety of erasure methods especially tailored to meet the different needs, requirements and regulatory compliance settings.
Choose the one relevant for you and your closing in on securing your data.
You can even choose our NATO certified erasure method.

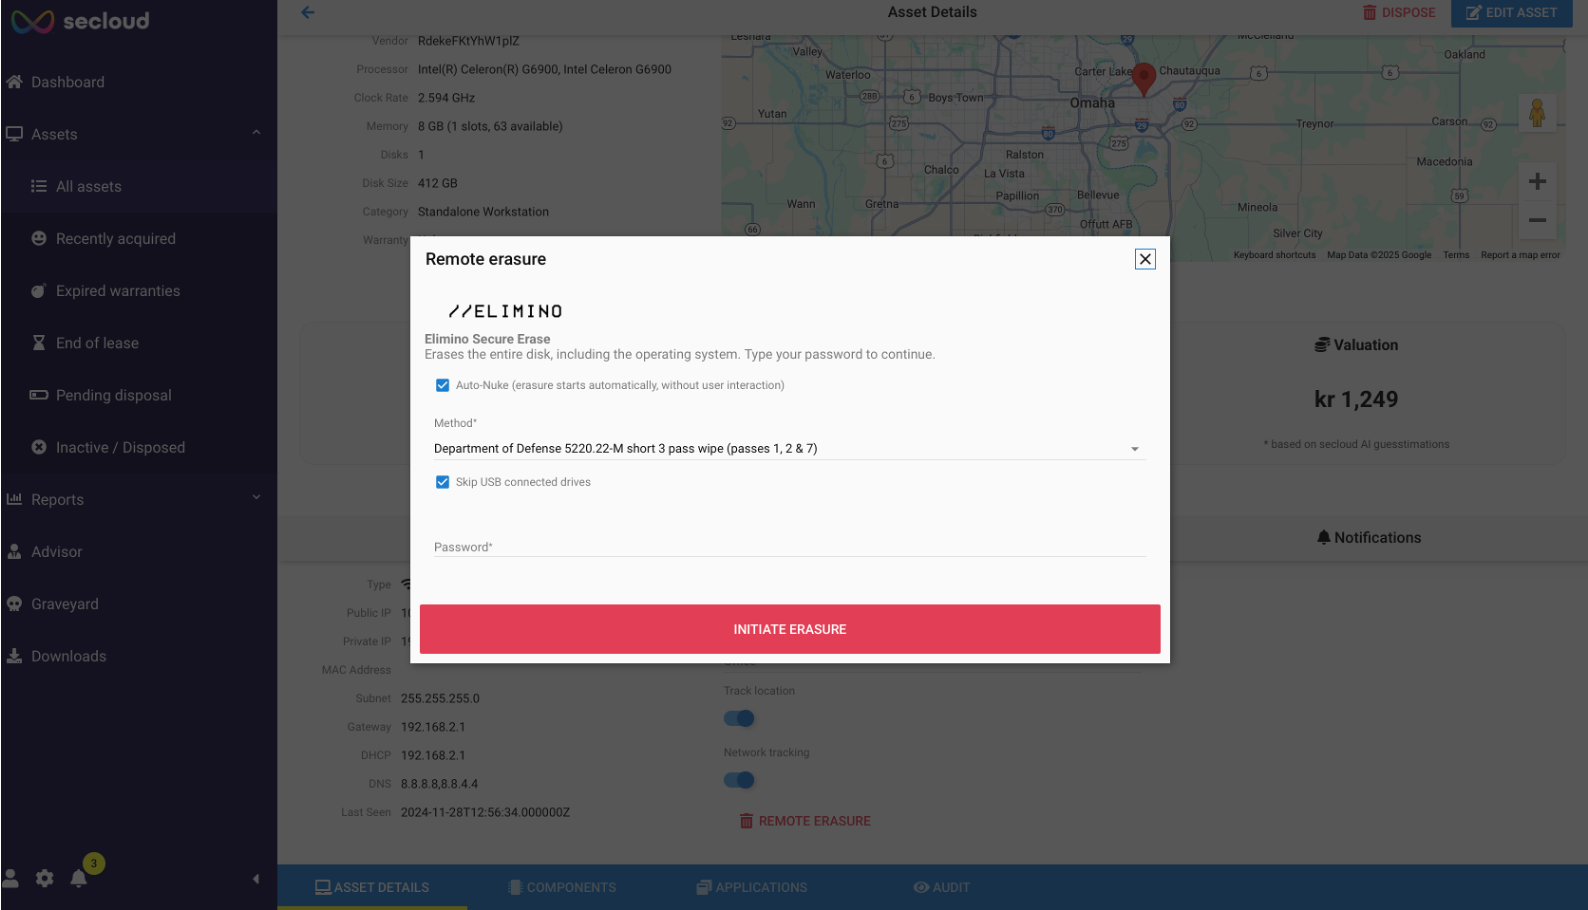
5. Choose the detailed erasure method
Erasure methods II
After choosing erasure method you can choose the detailed way of erasing – meeting different requirements.
6. Start erasing
Initiate erasure
Hit the initiate erasure button and the erasure is starting within seconds.
7. Verified erasure
Erased asset
Upon verified erasure your verified erasures and certificates are available in the dashboard,
On the asset the certificate is now available as a download and it will also be visible in the report section on the left- hand side
9. Tamper-proof erasure certificate
Verified erasure
Without a tamper-proof certificate that verifies the result of the erasure – you have nothing. .

Verified erasure
Without a tamper-proof certificate that verifies the result of the erasure – you have nothing. On the asset the certificate is now available as a download and it will also be visible in the report section on the left- hand side.